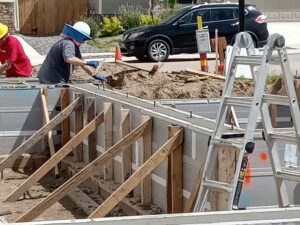
 “Pouring concrete is one of my favorite days of the whole process of building a home!” says Pikes Peak Habitat construction superintendent Eric Wells. “We’ve got the footer, and it starts being permanent. It shows the shape of the house.”
But there are some steps we have to take before the trucks even arrive. From the outside, the process might seem simple — but a lot of thought and precision go into creating the footer and the forms where the concrete will be poured.
“The footer is the connection between the ground and the house itself, so it’s got to be built right!” says Wells. “The footer is pretty wide, compared to the foundation wall we pour on top of it, and that width spreads the weight of the entire house across the ground and helps to reduce the amount the house sinks into the dirt.”
Even before building the footer, our engineers test how compact the dirt is to be sure it can support the weight of the house. Then construction volunteers, supervised by professional staff, check that footer forms are square on the lot, level, and shaped correctly. They measure from corner to corner to ensure 90-degree angles and also measure from the street to the house “to make sure the foundation isn’t crooked on the lot,” says Wells. “Lots of planning and preparation goes into most of the tasks we do on these houses.”
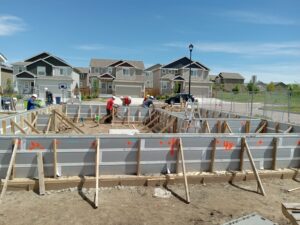 The concrete is poured in two phases. First it goes into the footer, then the foundation walls.
“Concrete is such an incredible material,” Wells says. “We’re able to work with it when it’s liquid, and then it turns into stone, and it’s solid. So this is now the permanent structure of the house, and we’ve got to work with it! So it’s kind of exciting.”
Steel is crucial in providing stability and support.
“The ground, even though we compact it, can still shift, and if it shifts too much in the right place and there’s no reinforcement, the bare concrete can crack,” Wells explains. “You’ve probably seen that on driveways.”
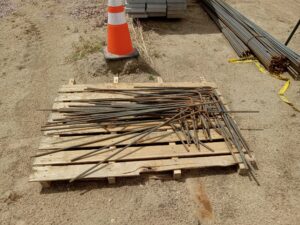 So we use steel rebar — short for reinforcement bar. “You can see it’s got ribs on it, so when the liquid is poured around it, it hardens; it locks into place,” he says. “This gets tied into the footer, and then Ls, like these, will go into the footer and then come up, and so they’ll basically connect the foundation wall to the footer itself.”
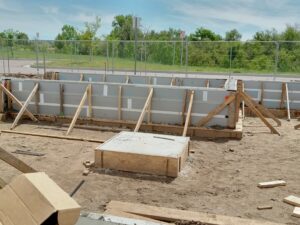
Other architectural features also provide support. For example, a smaller wall angling 90 degrees out serves as a buttress. “It just prevents the wall from caving in; it gives it additional support,” explains Wells. A square concrete pad in the middle of the foundation will hold a post supporting a steel beam. “It gives a lot more support, a lot more flexibility,” he says. “It kind of spreads uneven loads throughout.”
 In addition, while the concrete is still wet, construction volunteers place J-bars or anchor bolts. “The bottom of the J part gets sunk into the concrete,” explains Wells. “That way, when it solidifies, it is not coming up! And then we’ve got some square bearing plates that are sitting on the concrete below the threaded area. When we start framing, we are going to use wood. Our first piece of wood that’s touching the concrete is called a mud sill. We’ll be drilling holes through it, we’ll be taking off the nuts, we’ll be taking off the bearing plates, setting the wood on top of that, and then securing everything down with the bearing plate and nuts.”
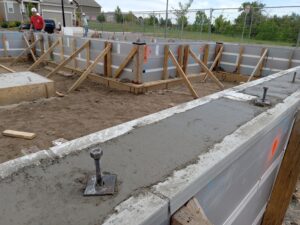 He explains that pressure-treated wood can sit right on the concrete, “but since the concrete isn’t always perfectly smooth, there’s a really good chance that air is going to go underneath it.” So between the wood and the concrete, “we put a foam-type product called sill seal,” he says. “That fills in any gaps and reduces or eliminates the air flow. We frame on top of that.”
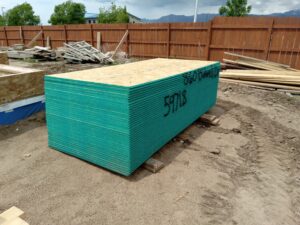 After the concrete in the foundation has set, the crew can start to add flooring. Wells says the boards with green edging are placed atop the joists. “That’s going to become the subfloor,” he explains. “Instead of just laying it on there, we install it with adhesive. If we don’t use adhesive, what we’ve seen — and what you’ve probably seen in older homes — is that the floor will squeak. It’s the plywood rubbing up against these joists, more often than not.”
In addition to adhesive, construction volunteers also use special nails to hold the plywood in place. “If you have the shaft of a nail with no rings, as the wood expands and contracts with temperature variants, those nails can start to back out,” he explains. “If it’s got the rings in it, the wood grain kind of is pushed down and shoved into that ring, and it cannot come out. Even trying to pull the nails out after they get nailed in causes a lot of damage.” So we use nails with rings when we lay down the subfloor sheeting.
Stay tuned as we fly trusses, build walls, and eventually put roofs on our homes in progress!

